This scene is my own creation. It is the best looking, best topology scene I have created so far, and it is made with minimal textures and polycount. I have made sure that it is a game ready scene. This means low texture resolution, instanced objects, low poly count, and low light complexity.
I created this scene using Blender and Substance painter. I then ported it over to Unreal Engine 5.4 to take the lighting to the next level. I added some post process effects like a fish eye lens, and a fuzz filter.
I created this scene using Blender and Substance painter. I then ported it over to Unreal Engine 5.4 to take the lighting to the next level. I added some post process effects like a fish eye lens, and a fuzz filter.
This is the first preview screenshot, where I made a blockout of the scene i wanted to make, i ensured the correct scale by using human references. From this point i decided to enhance the scene with walls, extra detail on supports, bevels and doors to increase the look of the scene.
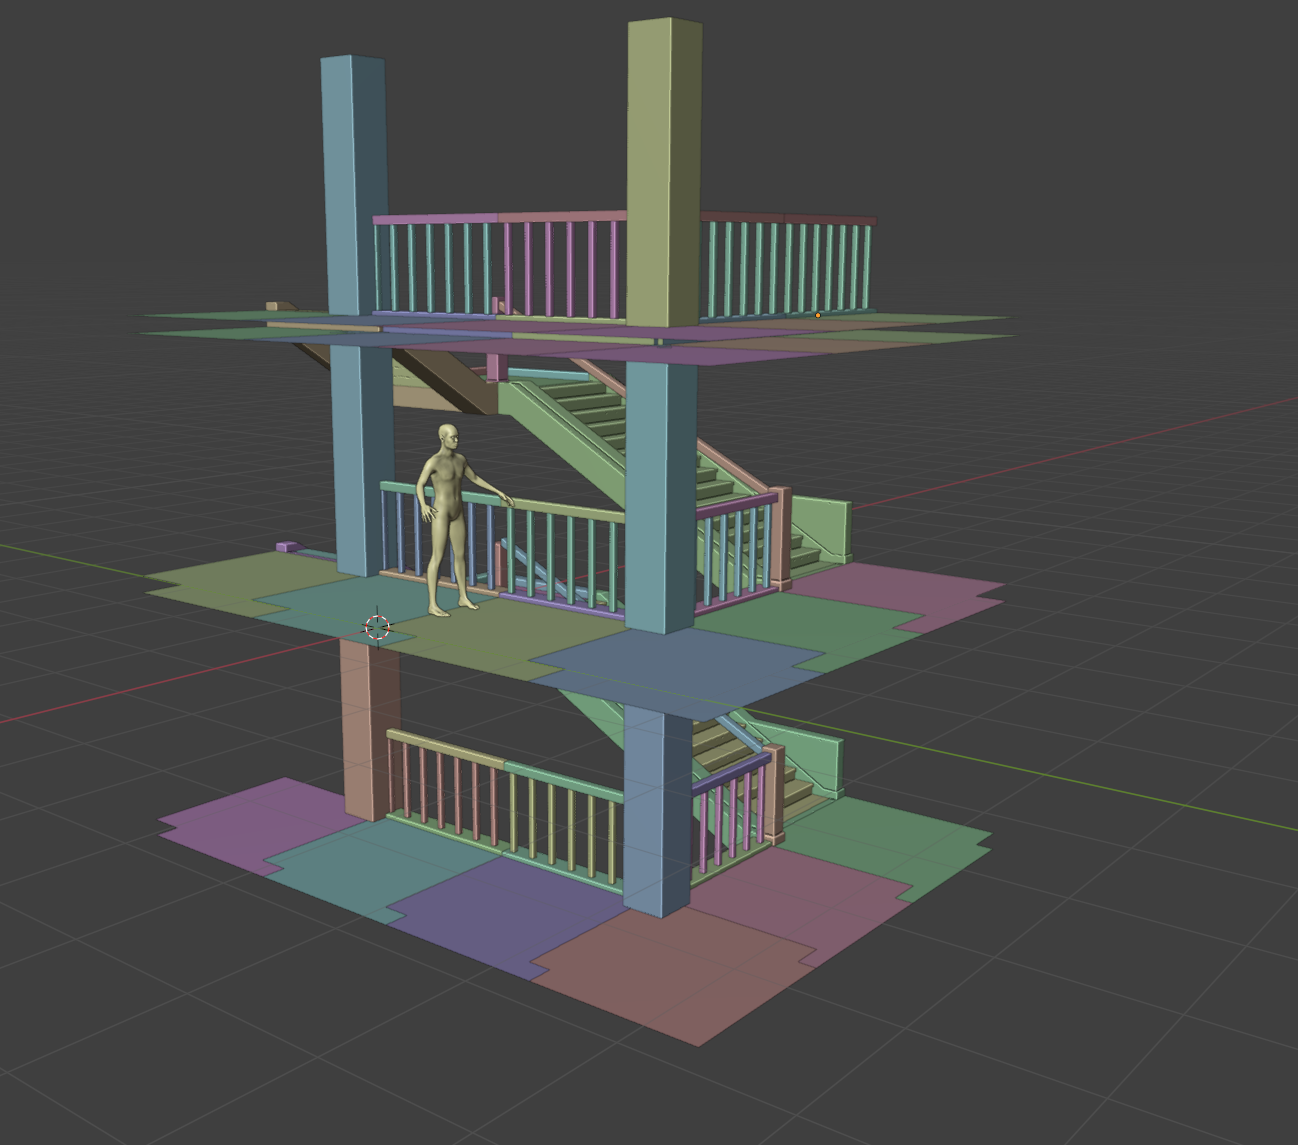
I started to add walls, extra detail underneath floors and detailed stair supports.
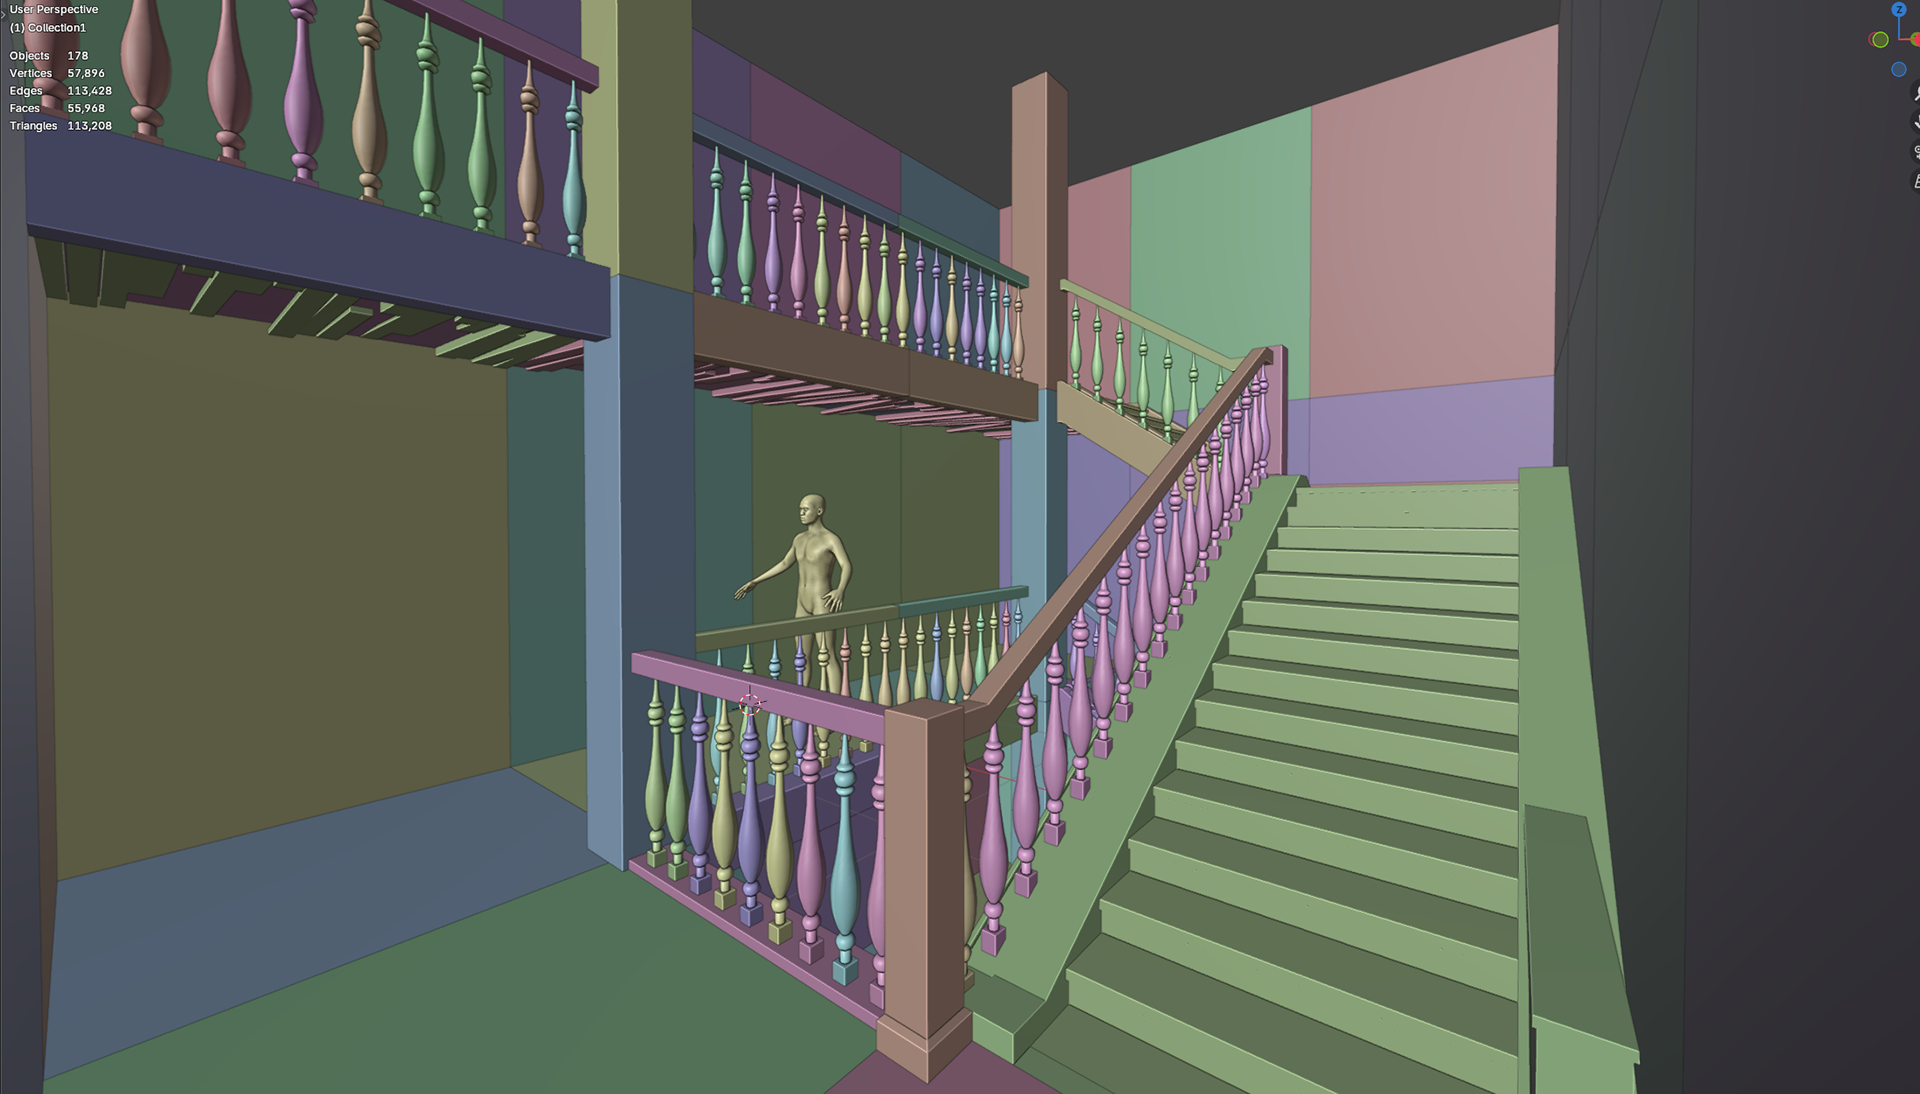
Here is the wireframe of the finished image, it has good topology and good framing. I made it this way to make use of trim sheets. Trim sheets allow me to have more detail at the cost of it being tiled, however with the current view you wouldn't be able to tell it is tiled.

This is the final view, I took full advantage of lumen in UE 5.4, I chose to use UE5.4 as it is a real time renderer, allowed me to use post process materials at an easier use. It allowed me to tweak with the lighting at a real time pace to fine tune it better. This is the result of a few hours of tweaking, i wanted to give it a resident evil style lighting. I'm making sure that if i was to go into a game development with this scene it would be easily done, the only things I would need to change is the colliders.
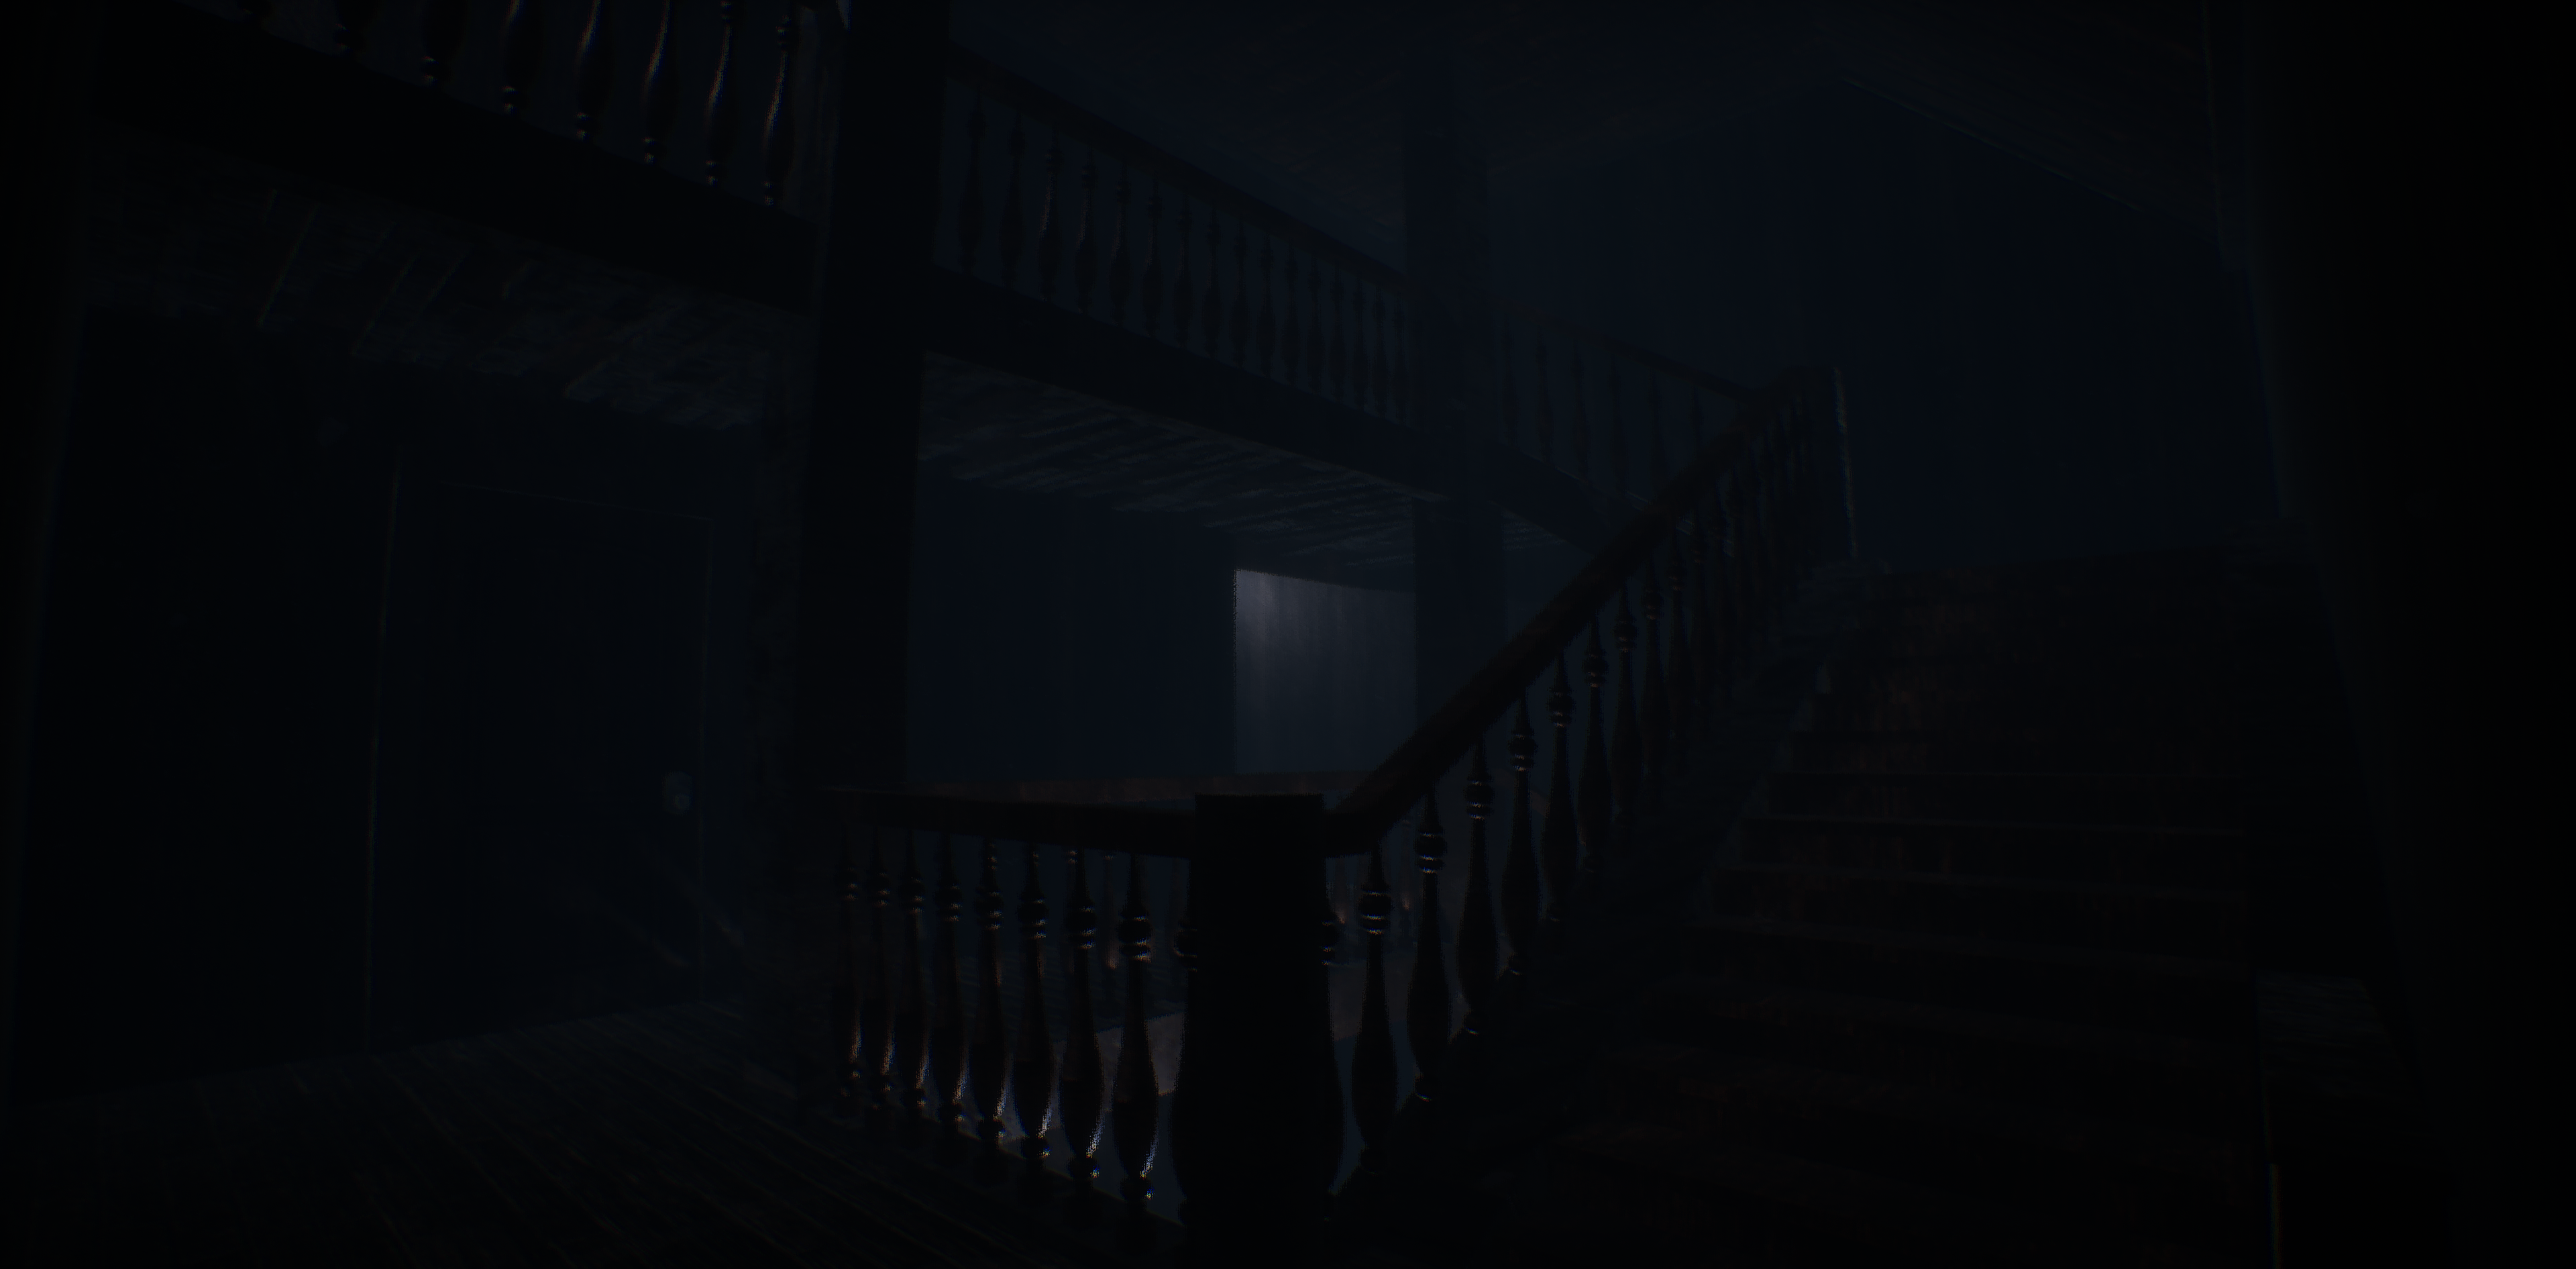
When creating this scene I based it off such things like the games, resident evil, and devour. This is a completly original place I created to test out lighting, material creation, and post process material creations. This project has allowed me to learn a lot about optimization. This scene easily pulls around 120fps+.
I ensured there was no light bleeding in the scene, and made sure there was no shading or inverted normals. Instead of increased lights I made a grey cubemap to have ambient lighting in the whole scene.
I ensured there was no light bleeding in the scene, and made sure there was no shading or inverted normals. Instead of increased lights I made a grey cubemap to have ambient lighting in the whole scene.